Importing and Posting Cash Receipts
You can use the Cash Receipts Import form to quickly import and post cash receipts in the system. For example:
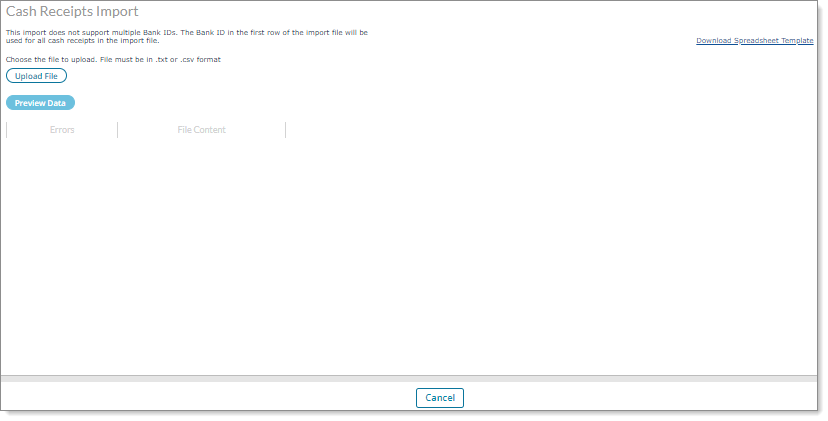
To perform an import using the Cash Receipts Import form, simply upload a file for import and then view any errors that occurred during the import or view successfully imported rows.
Note the following:
| • | This form is only available for service providers. |
| • | You can access this form by selecting Cash Receipts Import on the Accounts Receivable|Action menu or by selecting the Import icon ( |
| • | Client Access Group security is enabled on this form. |
To import cash receipts:
| 1. | Select Download Spreadsheet Template to download a .csv file to your computer that contains the cash receipts import headings in row 1. A separate window displays the downloaded file link. |
| 2. | Click Open File. The spreadsheet template displays, where you can enter the cash receipts information. |
Note: All columns in this spreadsheet are required except for the Description 1 and Description 2 columns.
The spreadsheet template contains the following columns:
|
Column |
Description |
|---|---|
|
Client Number |
The client number associated with the deposit. |
|
Bank ID |
The bank ID associated with the deposit. Note: The system uses the Bank ID from the first row in the import file for all Cash Receipts imports on the file. |
|
Deposit Date |
The deposit date associated with the deposit. |
|
Description 1 |
The description associated with the deposit (optional). |
|
Description 2 |
The description associated with the deposit (optional). |
|
Deposit Number |
The deposit number associated with the deposit. |
|
Line Type |
The line type associated with the deposit. |
|
Deposit Type |
The type of deposit. |
|
Deposit Amount |
The total amount that was deposited. |
|
Deposit Reference |
The unique reference ID associated with the deposit, which can include alphanumeric characters, but not spaces. |
|
Posting Type |
The posting type associated with the deposit. (Posting types are established on the Cash Receipt Rules form.) |
|
Invoice Number |
The invoice number associated with the deposit. |
|
Amount |
The amount that is applied to the deposit. |
| 3. | Select Upload File. Click Add Files and select the file to upload, then click Start Upload. |
| 4. | Click Close. The uploaded filename displays. |
| 5. | Select Preview Data. Information displays on the following tabs: |
| • | Errors: Any cash receipts errors from the import process display on this tab. Click Error Report to view them. (A browser window opens where you can download the .csv file that contains the errors.) |
| • | File Content: Any successful rows from the import process display on this tab. |
Note: If you select Preview Data before uploading the file, no information displays.
| 6. | Click Import Cash Receipts to post the cash receipts that display on the File Content tab. The "File content successfully imported" message displays. Click OK. |
Note: Any additional errors that occur during the posting display in the existing errors list on the Errors tab.
