Getting Started with the PrismHR API
This document describes how to:
| • | Find API documentation and resources |
| • | Create a web service user in PrismHR |
| • | Determine your PEO ID |
| • | Create a new API session |
API Documentation
PrismHR maintains an interactive online version of our documentation for all supported versions of the API. You can access the API docs at https://api-docs.prismhr.com.
| • | prismhr-api: https://api.prismhr.com/prismhr-api/ |
Note: The API Support Policy was updated in 2022. For details, see "Updated API Support Policy" in the Support and Security Updates section of the API documentation.
Additional API documents, including the Single Sign-On User Guide, are available on the "API Reference Documents" page under Release Information.
Creating a Web Service User
With the Web Service Users form, you can configure multiple web service users to provide customized access for each application that calls the PrismHR API.
The API shares the same user registry as all other web-based services in PrismHR. To call the API from your client application, you must configure a web service user in PrismHR according to the security requirements of your organization. Typically, this means restricting web service user access to certain clients/companies, API methods, and IP addresses.
To create a web service user:
| 1. | In PrismHR, open the Back Office menu and select System|Change > System Parameters. Then, from the Actions menu, select Web Service Users. |
| 2. | Complete the following fields as needed: |
|
Field |
Description |
|||||||||
|---|---|---|---|---|---|---|---|---|---|---|
| User ID |
Enter or select the ID for the user profile. Note: If this is a Marketplace Integration user, enable that field to select a vendor description. (After making a selection, if this is a new user the vendor's name displays in the User ID field.) After you specify the user ID, PrismHR will notify you if there are pending updates for that user. To review these updates, click Review Updates. After you click Review Updates, the Review Web Service User Updates window opens, describing the pending updates. Do one of the following when this window displays:
|
|||||||||
|
Marketplace Integration |
Enable this field to display a second field where you can select the Marketplace Integration vendor's description. (After making a selection, if this is a new user the vendor's name displays in the User ID field.) Note: If the user record already exists but the Marketplace Integration field is not enabled, you can enable this field and select a vendor's description, which does not overwrite the existing User ID. After saving this update, you cannot change the User ID, the Marketplace Integration field, or the vendor description field. |
|||||||||
| User Name | Name of the user. | |||||||||
| Password | Password for the web service user (required for obtaining an API session token). | |||||||||
| Account Disabled | Select this field to deactivate the web service user account. | |||||||||
| Company Access |
Defines the companies that users can access. Options are:
Note: By default, web service users can see only active companies. With some API methods, they can also see inactive companies. Companies with other statuses (pending, pre-terminated, and terminated) are not available. |
|||||||||
|
Minimum API Version |
Select a supported API version from the list. The system will restrict the user from accessing versions prior to the selected one. Note: 2.0 corresponds to all versions of prismhr-api. |
|||||||||
| Company ID | (Optional) Enter one or more Company IDs. A Company Name displays for each ID. The Company Access setting determines whether the user is restricted from seeing the specified companies, or only has access to the specified companies. | |||||||||
| Contact Information | For example, the user's phone number or email address. | |||||||||
| Disable IP Restrictions |
Select this field to disable the IP restriction feature. Note: This is not recommended for use except by Development. |
|||||||||
| Allowed IPs |
Allows specific IP addresses to access the web service engine with the user's credentials. To specify a range of IP addresses, use a hyphen. For example: Note: The IP address range feature applies to API versions 1.23 and above. This example would grant access to all IP addresses falling between 123.456.789.100 and 123.456.789.200, inclusive. |
|||||||||
| Disable Method Restrictions |
Select this field to disable method restrictions. Note: This is not recommended for use except by Development. |
|||||||||
| Allowed Methods |
Use this grid to grant the web service user access to only certain endpoints of the PrismHR API. For example, if you created a web service user for a time clock vendor, you might want to restrict that user's access to only methods that return time clock-specific data. When setting up allowed methods, you can use an asterisk (*) to grant access to all methods in a particular service. For example, ClientMasterService.* grants the web service user access to all Client Master Service methods. You cannot use an asterisk to grant access to SystemService methods. Note: Leave the Allowed From and Allowed To fields blank if there is no time of day restriction for the method. All times are Central Time.
Any changes made here will be applied the next time the user logs into the system. If the user is currently logged in, access does not change. |
| 3. | Click Save. |
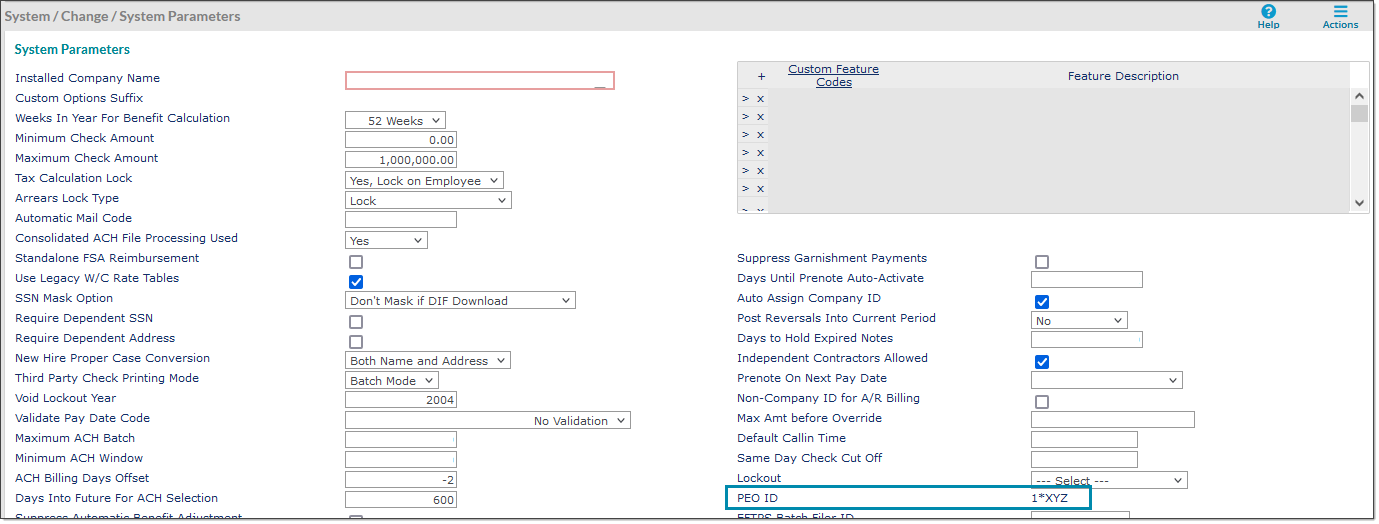
Verifying the PEO ID
Once you create a web service user, we recommend verifying your PEO ID. To create an API session, you need this PEO ID along with your web service user credentials.
The PEO ID field is located on the System Parameters form, found in the Back Office menu under System|Change.
Note: Do not add or change the PEO ID. If the PEO ID field is blank, submit a support request through the Customer Resource Center.
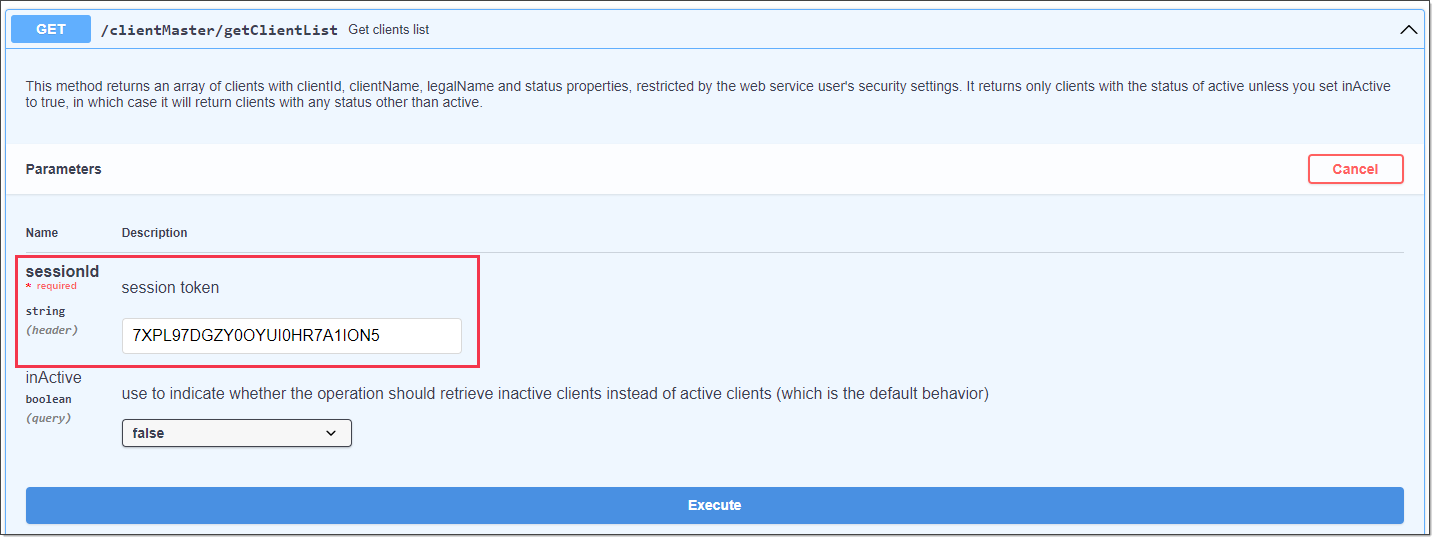
Creating a Sample PEO Session
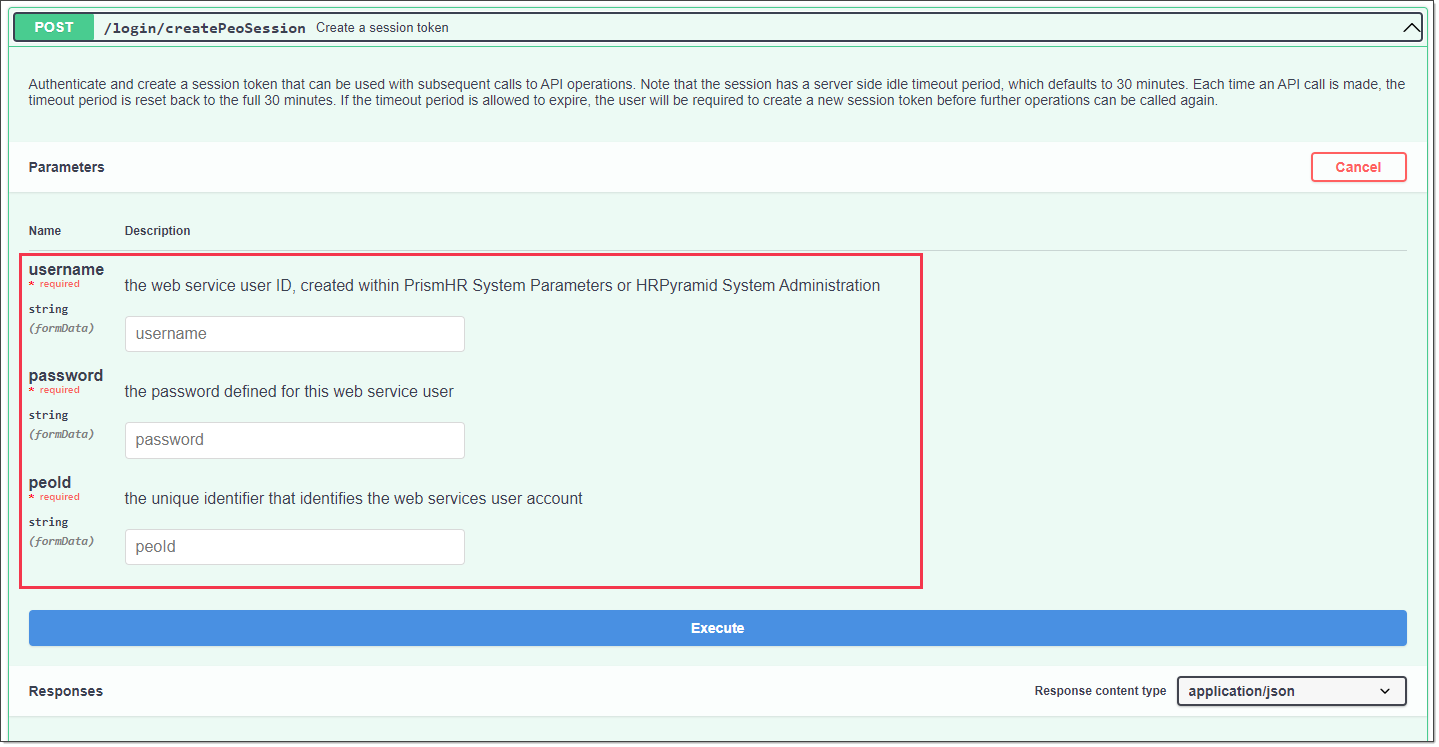
To create a PEO session and start using the API, you need to generate a sessionID or session token. This ID authenticates your API session during each method call. To generate a session ID, you need to provide three pieces of information:
| • | Web service user ID (also called username) |
| • | Web service user password (also called password) |
| • | PEO ID (also called peoId) |
Note: API sessions have a server-side idle timeout period of 30 minutes. Each time you make an API call, the timeout period is reset to the full 30 minutes. If the timeout period expires, you must create a new session token.
To create a PEO session:
| 1. | Open the Swagger file for the version of the API that you are using. Note that the screenshots below feature an older version of the API (version 1.15). |
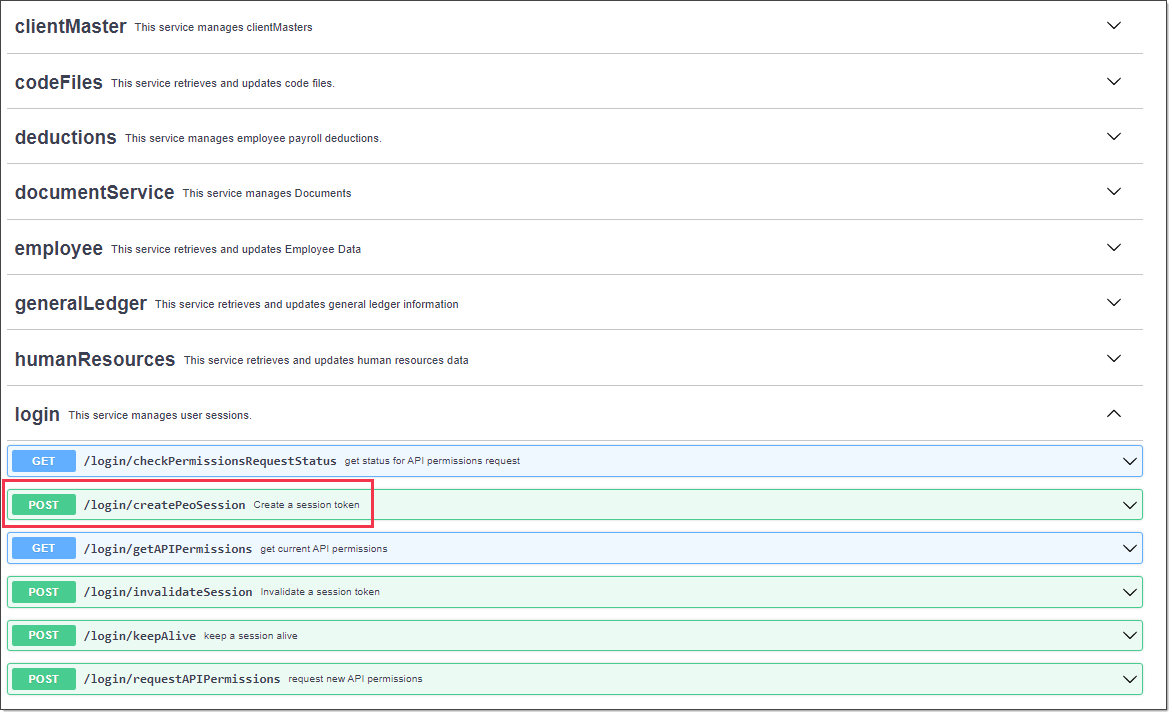
| 2. | Under the login service, click Create a session token. |
| 3. | In the Parameters section, enter values for the username, password, and peoId. |
| 4. | Click Try it out!. The sessionID displays in the Response Body. |
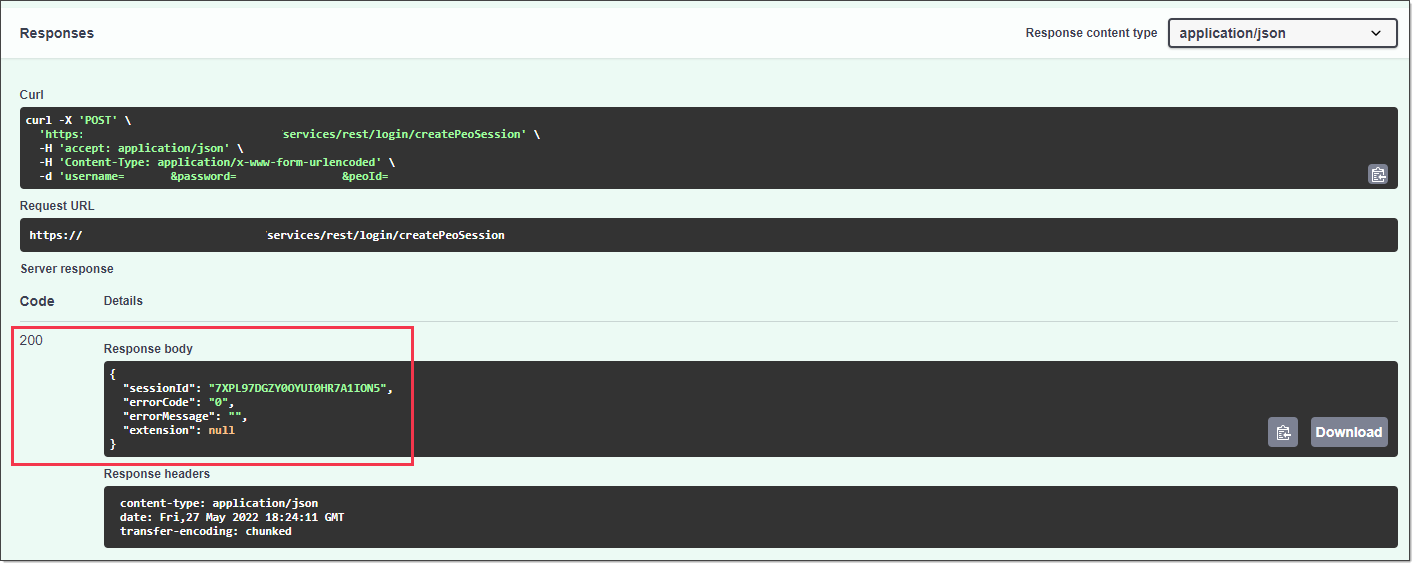
You can use this sessionID when calling any API method.
Maintaining Sessions
The API also provides several options for maintaining web service user sessions after you create them:
| • | LoginService.keepAlive (version 1.24 and above) — pings the API with your sessionId and keep the session alive longer. |
| • | LoginService.invalidateSession (version 1.25 and above) — cancels a session by invalidating its sessionId. |
LoginService also provides other endpoints for checking web service user permissions. For complete details, see the PrismHR API docs.
About REST Services
Note: API version 1.30, scheduled for release in September 2022, will be the last version to support both REST and SOAP; we will no longer support SOAP after this version. To provide time for SOAP users to update their integration platforms, version 1.30 will remain active longer than our standard 12-to-15-month life support period. We recommend all our API users move onto REST during this transition period
The API has REST endpoints as well as the traditional SOAP endpoints for every service. The REST endpoints can return either JSON or XML message bodies.
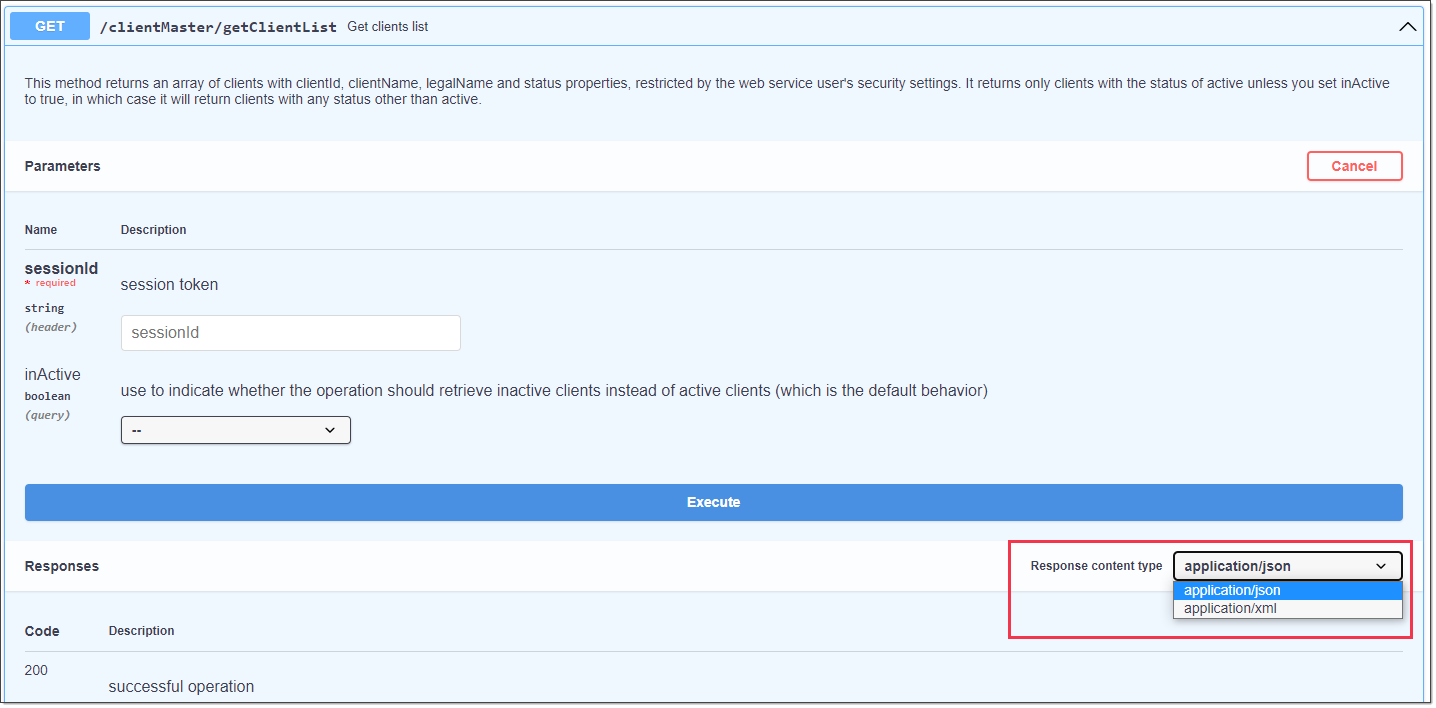
For each request, you can set the HTTP request header variable to define the type of response. In the Response Content Type drop-down:
| • | Select application/xml to receive an XML message body. |
| • | Select application/json to receive a JSON message body. |
If you omit the variable entirely, the API defaults to the JSON response.
